
For a starting point you can trust, run your reamer at a fraction of your drilling SFM for the same material, and set your feed at a multiple of the IPR you'd use for drilling that diameter. Those two rules, widely cited across industry sources, get you close enough to take a first cut without scrapping a part. For exact RPM and IPM, plug your diameter and material SFM into the feeds & speeds calculator in Availzye Machinist Pro.
Quick rules before you touch the controls:
- SFM guideline: Start at a fraction of your drilling SFM for the same material (carbide reamers can run toward the higher end; HSS stays lower).
- Feed guideline: Set IPR at multiple times your drill IPR for the same diameter. Higher feed keeps the reamer cutting rather than rubbing.
- Blind holes: Reduce speed moderately to control heat and chip accumulation where chips can't exit freely.
- Get precise outputs: Enter reamer diameter, material SFM, and hole type (through or blind) into Availzye Machinist Pro's calculator to get RPM, IPM, and stock allowance in one step.
Table of Contents
- Material starting points: SFM and IPR cheat sheet
- How do you calculate RPM and feed rate for reaming?
- Worked example: 0.500" reamer in 6061-T6 aluminum
- What pre-drill size and stock allowance does reaming require?
- How do you choose the right reamer for the job?
- Why does coolant matter so much for reaming?
- Common reaming problems and how to fix them fast
- How Availzye Machinist Pro prevents common reaming calculation mistakes
- Key Takeaways
- What experienced machinists actually prioritize
- Availzye Machinist Pro: calculate reaming parameters and manage your tools in one place
- Sources and further reading
Material starting points: SFM and IPR cheat sheet
These are shop-floor starting values, not guarantees. Dial in from here based on your setup rigidity, coolant, and tolerance target.
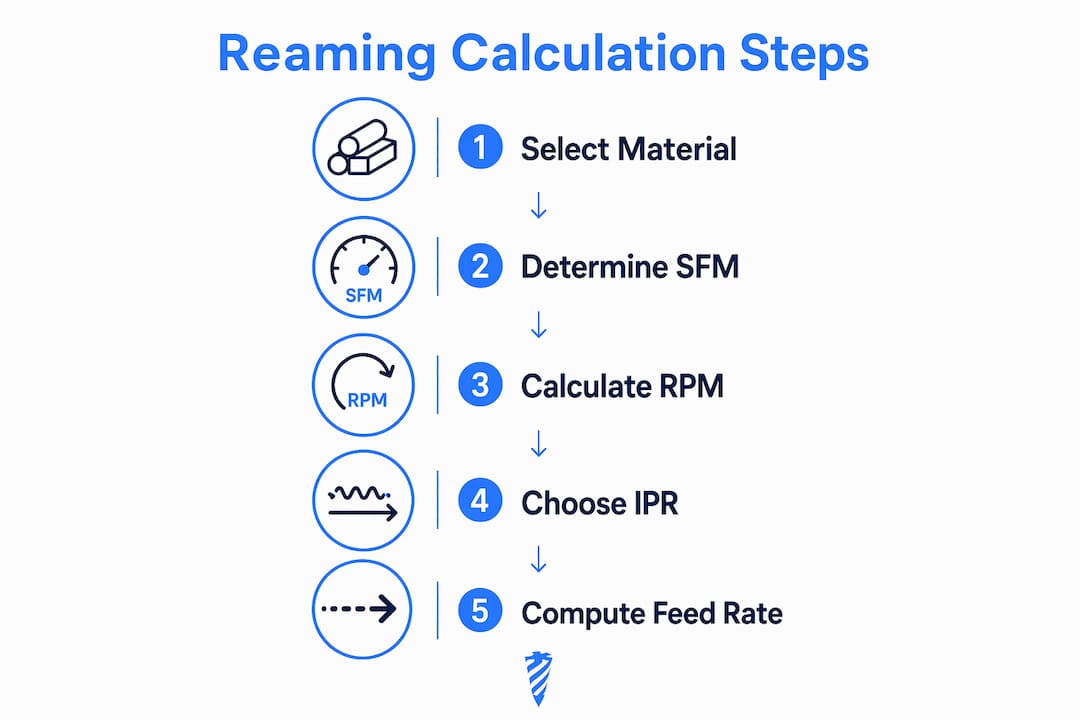
| Material | HSS SFM | Carbide SFM | Starting IPR | Notes |
|---|---|---|---|---|
| Aluminum 6061 | 150–250 | 500–1000 | 0.008–0.012" | Free-cutting; use flood coolant or light oil for finish |
| Mild steel | 40–60 | 200–350 | 0.005–0.008" | Manageable chip form; soluble oil recommended |
| Stainless steel | 25–40 | 60–130 | 0.003–0.005" | Work-hardens fast; never dwell; sulfurized oil preferred |
| Gray cast iron | 50–90 | 75–150 | 0.006–0.010" | Dry or light mist acceptable; abrasive chips |
| Titanium Ti-6Al-4V | 15–25 | 40–80 | 0.003–0.005" | Thermal sensitivity is severe; high-pressure coolant required |
| Copper/brass | 50–90 | 100–175 | 0.006–0.010" | Gummy; use high feed to prevent built-up edge |
SFM ranges above are drawn from Hertel solid carbide reamer data and Rock River Tool carbide-tipped recommendations; treat them as starting points and adjust for your machine's rigidity and coolant delivery.
Why values differ by material: Stainless work-hardens the instant the tool slows or dwells, so you need a higher feed-to-speed ratio than mild steel. Titanium generates intense localized heat, which is why SFM stays low even with carbide. Aluminum's high thermal conductivity lets you run fast, but the gummy chip form demands good coolant targeting to prevent built-up edge on the flutes.
HSS vs. carbide at a glance:
- HSS: Use for low-volume work, softer materials (aluminum, mild steel, plastics), and when budget or regrind capability matters. Tolerance to H8 is routine.
- Carbide: Use when you need H7 or tighter, high-volume production, or harder/abrasive materials. Carbide runs 2–3× the SFM of HSS in the same material, which shortens cycle time and improves finish consistency.
How do you calculate RPM and feed rate for reaming?
Two formulas cover everything. Get these right and the rest is just plugging in numbers.
Primary RPM formula (inch units):
RPM = (SFM × 12) / (π × D)
Since π ≈ 3.1416, the constant simplifies to 3.82:
RPM = (SFM × 3.82) / D
where D is reamer diameter in inches. This is the standard RPM conversion used across industry calculators.
Feed rate conversion:
Feed (IPM) = RPM × IPR
That's it. Once you have RPM and your chosen IPR from the cheat sheet above, multiply them for your table feed in inches per minute.
Metric users: RPM = (Vc × 1000) / (π × D), where Vc is cutting speed in m/min and D is diameter in mm.
Step-by-step input checklist before you calculate:
- Confirm diameter units (inches or mm) and enter the correct value.
- Select material SFM from the cheat sheet or your toolmaker's data.
- Choose HSS or carbide to apply the right SFM band.
- Flag through-hole or blind-hole (blind: reduce SFM by 10–20%).
- Confirm coolant is on and targeted at the cutting zone before running.
- Cross-check your IPR against 2–3× your drill IPR as a sanity check.
Choosing SFM in practice: If your setup is rigid (shrink-fit or hydraulic holder, short stick-out, well-supported workpiece) and you're running carbide, you can push toward the upper SFM limit. A loose collet, long reach, or thin-wall part calls for the lower end. When in doubt, start low and step up in 10% increments while checking finish and diameter.
Worked example: 0.500" reamer in 6061-T6 aluminum
Walk through this once and the formula becomes automatic.
Inputs:
- Reamer diameter: 0.500"
- Material: 6061-T6 aluminum
- Chosen SFM: 200 (mid-range HSS; carbide would allow 600–800)
- Drill IPR baseline for 0.500" in aluminum: ~0.004"
Step-by-step calculation:
- RPM = (200 × 3.82) / 0.500 = 764 / 0.500 = 1,528 RPM
- Reamer IPR = 2–3× drill IPR = 2.5 × 0.004 = 0.010 IPR
- Feed rate (IPM) = 1,528 × 0.010 = 15.3 IPM
Sanity check: 1,528 RPM at 0.500" diameter gives 200 SFM. Feed at 15.3 IPM is well above the rubbing threshold. Expected finish: Ra 63–125 µin with flood coolant, which is typical for a reamed aluminum bore. For a tighter surface finish prediction, use Availzye Machinist Pro's surface finish calculator alongside the feeds and speeds output.
Adjustments to note:
- Blind hole: Reduce RPM to ~1,220–1,375 (80–90% of 1,528). Use right-hand spiral flutes or through-tool coolant to lift chips.
- Carbide instead of HSS: At 600 SFM, RPM = (600 × 3.82) / 0.500 = 4,584 RPM; feed scales proportionally.
- Chatter check: If chatter appears, slow RPM by 10–15% and raise IPR slightly. Verify holder runout before adjusting parameters.
- Runout check: Measure TIR at the reamer shank before cutting. More than 0.0002" TIR will produce an oversized hole regardless of how good your numbers are.
What pre-drill size and stock allowance does reaming require?
Reaming is a precision finishing operation that depends on correct hole preparation as much as it depends on speed and feed. Get the pre-drill wrong and no parameter adjustment will save the part.
**Stock allowance by diameter band: **
- Under 0.250": Leave 0.003–0.005" per side (0.006–0.010" on diameter).
- 0.250"–0.500": Leave 0.005–0.010" per side (0.010–0.020" on diameter).
- 0.500"–1.000": Leave 0.008–0.015" per side (0.016–0.030" on diameter).
- Over 1.000": Leave 0.010–0.020" per side; consider boring to size first for tight tolerances.
Too little stock causes rubbing and chatter. Too much overloads the cutting edges and produces tapered or oversized holes. Insufficient stock left for the reamer is one of the most common causes of premature wear.
Runout and fixturing checks:
- Measure spindle/holder TIR before every precision reaming job. For H7 tolerance, keep TIR under 0.0002". For H6, aim for 0.0001" or better.
- Use a floating reamer holder when the pre-drilled hole and spindle are not perfectly aligned. Rigid holding with misalignment is a fast way to produce a bell-mouthed hole.
- Clamp the workpiece so it cannot shift under cutting force. Even light reaming passes generate enough torque to rotate an unsecured part.
Depth and lead considerations:
- For holes deeper than 3× diameter, reduce feed by 10–15% to allow chip clearance.
- For blind holes, reduce speed by roughly 10–20% and use right-hand spiral reamers or high-pressure through-tool coolant to prevent chip packing.
Pro Tip: Before drilling the pilot hole, check that your drill is running true. A wandering drill leaves an oversized, off-center pilot that no reamer can fully correct.
How do you choose the right reamer for the job?
Tool selection determines whether your speed and feed numbers actually produce the tolerance and finish you need.
By tool material:
- HSS: Best for aluminum, mild steel, plastics, and low-volume work. Tolerates regrinding well. Expect H8 tolerance routinely, H7 with care.
- HSS-cobalt (M42): A step up for stainless and alloy steels. Better heat resistance than standard HSS; runs slightly higher SFM.
- Carbide-tipped: The workhorse for production reaming in steel and cast iron. Runs 2–3× HSS SFM, holds H7 consistently, and costs less than solid carbide.
- Solid carbide: Best for hard materials (>35 HRC), high-volume aluminum, and when H6 tolerance is required. Brittle; needs a rigid, vibration-free setup.
Flute style and chip flow:
- Straight flutes: General purpose; good for through-holes in most materials.
- Right-hand spiral (chip-lifting): Pulls chips up and out of the hole. Use for blind holes where chips cannot fall through.
- Left-hand spiral (chip-pushing): Pushes chips ahead of the reamer. Use for through-holes where chip evacuation downward is acceptable and you want a cleaner entry.
Coatings:
TiN extends tool life in steel and cast iron by reducing friction and heat. TiAlN handles higher temperatures and suits stainless and alloy steels better. Uncoated carbide or HSS is often preferred for aluminum because some coatings can cause built-up edge with gummy chips.
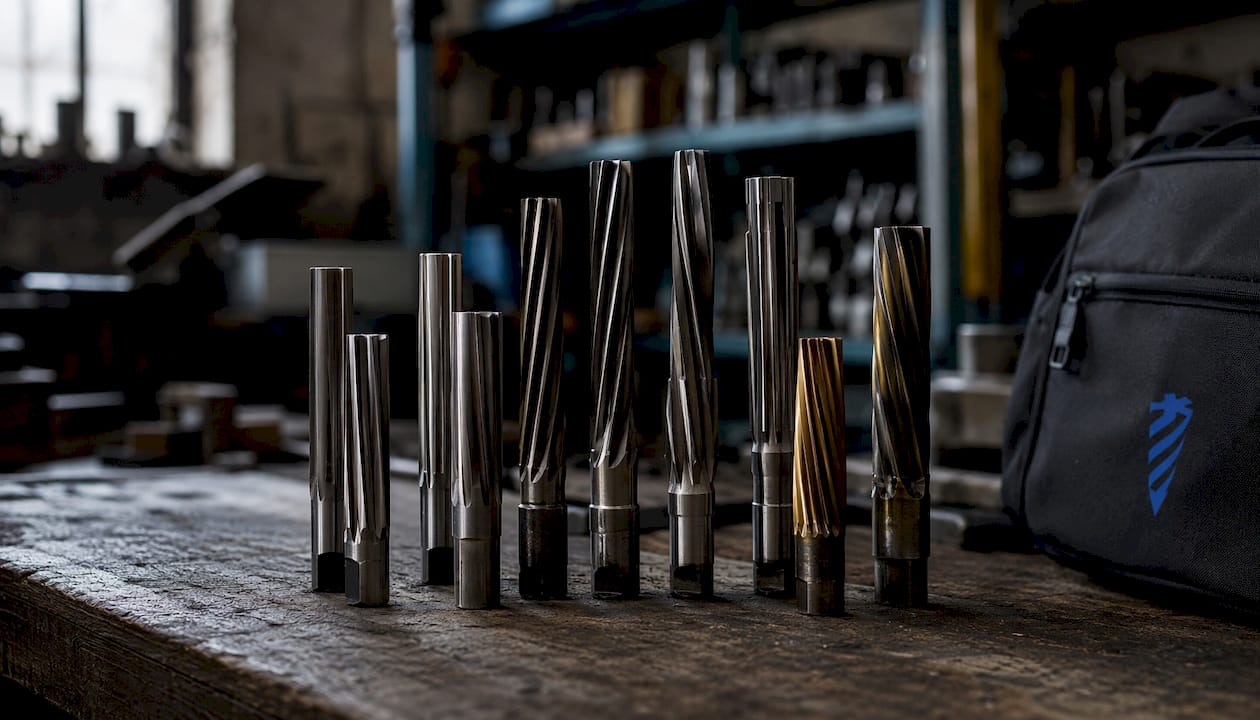
Pro Tip: When regrinding, work only the bevel/taper lead. Reamers cut on the bevel lead, not the lands. Sharpening the lands reduces clearance, increases friction, and accelerates wear. A reamer that's been over-ground on the lands will run hot and produce oversized holes even at correct SFM.
Why does coolant matter so much for reaming?
Coolant in reaming isn't primarily about temperature. It's about chip evacuation. A chip that gets recut against the hole wall scores the bore and ruins the finish in one pass.
Recommended coolant by material:
- Aluminum: Flood coolant (soluble oil or light synthetic) or a dedicated aluminum cutting fluid. Some shops use kerosene-based fluids for mirror finishes.
- Mild steel: Soluble oil at approximately 40:1 dilution. Soluble oil at ~40:1 dilution is a widely recommended starting concentration for reaming.
- Stainless steel: Sulfurized or chlorinated cutting oil. Stainless generates sticky chips that weld to flutes without an EP (extreme pressure) additive.
- Cast iron: Dry or light mist is acceptable. Cast iron chips are powdery and don't tend to recut; flood coolant can cause thermal shock in some setups.
- Titanium: High-pressure coolant, preferably through-tool. Titanium's low thermal conductivity traps heat at the cutting edge; you need aggressive fluid delivery to pull it away.
Chip evacuation strategies:
- Through-tool coolant is the most reliable method for blind holes. It forces chips up and out rather than letting them pack at the bottom.
- For through-holes, flood coolant directed at the entry point works well with straight or left-hand spiral flutes.
- High-pressure coolant (above 300 PSI) improves chip break-up in deep holes and tough materials.
Pro Tip: Aim the coolant nozzle at the cutting zone, not the shank. Coolant that hits the shank and runs down to the flutes arrives too late and too warm to do much good. Direct delivery to the cutting edges is what prevents scoring and premature wear.
Common reaming problems and how to fix them fast
Most reaming failures trace back to setup, not parameters. Check the pre-flight list before changing speeds.
| Symptom | Likely Cause | Quick Fix |
|---|---|---|
| Chatter / vibration | Speed too high, feed too low, loose holder | Reduce RPM, increase feed; verify holder TIR |
| Oversized hole | Runout, speed too high, too much stock | Check TIR; reduce SFM; verify pre-drill diameter |
| Scoring / scratched wall | Chip recutting, poor coolant delivery | Redirect coolant; check flute direction; clear chips |
| Poor surface finish | Feed too low (rubbing), dull tool, wrong coolant | Increase IPR; inspect cutting edges; change fluid |
| Tapered hole | Misalignment, worn lead | Use floating holder; regrind or replace reamer |
| Rapid wear | Wrong SFM for material, no coolant | Reduce SFM; verify coolant concentration and flow |
Pre-flight checklist (run before blaming parameters):
- Holder TIR measured and within tolerance for the target class (H7: ≤0.0002"; H6: ≤0.0001")
- Pre-drill diameter confirmed within stock-allowance range
- Workpiece clamped and not able to rotate under torque
- Coolant flow verified and nozzle aimed at cutting zone
- Reamer cutting edges inspected (no chips, no built-up edge)
- Hole type (through/blind) confirmed and speed adjusted accordingly
Regrind vs. replace: Regrind when the lead shows wear but the body is undamaged and the reamer holds diameter. Replace when the body is undersized from previous grinds, the lands are damaged, or the reamer has been over-ground. For precision H6/H7 work, a worn reamer that's borderline is a scrap risk. The Tool Crib in Availzye Machinist Pro lets you log regrind cycles and set a maximum regrind count per tool so you're never guessing whether a reamer has life left.
How Availzye Machinist Pro prevents common reaming calculation mistakes
Rule-of-thumb math gets you in the ballpark. A calculator that enforces unit checks, applies blind-hole corrections, and flags input conflicts gets you to the right number the first time.
Mini walkthrough using the 0.500" / 6061 example:
| Input | Rule-of-Thumb Only | Availzye Machinist Pro Output |
|---|---|---|
| Diameter | 0.500" | 0.500" (unit validated) |
| Material SFM | User estimates ~200 | 200 SFM (HSS) / 600 SFM (carbide) auto-selected |
| Hole type | Through (assumed) | Through or blind flag; blind applies 10–20% speed reduction |
| RPM | 1,528 (manual calc) | 1,528 RPM (verified) |
| IPR | 0.010 (2.5× drill IPR) | 0.010 IPR (range-checked against diameter) |
| Feed rate | 15.3 IPM | 15.3 IPM (confirmed) |
| Stock allowance | Not calculated | 0.008–0.010" per side (auto-suggested) |
| Coolant flag | Not checked | Flagged: flood coolant required for aluminum |
Beyond the feeds and speeds output, Availzye Machinist Pro's chatter prediction tool checks whether your RPM falls in a stable cutting zone for your setup. The tool deflection calculator flags whether your stick-out and feed force combination risks pushing the reamer off-center, which is a common cause of oversized holes that looks like a speed problem. Calculated parameters export directly to the G-code generator so you're not re-entering numbers by hand.
Plans start at $9.99/month for individual machinists, with a 7-day free trial. No commitment needed to verify your reaming parameters on the first job.
Key Takeaways
Start with the 50–70% SFM rule and 2–3× drill IPR, verify with the RPM formula, and fix hole prep before adjusting any parameter.
| Point | Details |
|---|---|
| SFM and feed rule | Run reamers at 50–70% of drilling SFM; set IPR at 2–3× your drill IPR for the same diameter. |
| RPM formula | Use RPM = (SFM × 3.82) / D for inch units; multiply RPM × IPR to get feed in IPM. |
| Hole prep first | Pre-drill within 0.005–0.010" per side of final diameter; verify holder TIR before cutting. |
| Blind-hole adjustment | Reduce speed by 10–20% for blind holes; use right-hand spiral flutes or through-tool coolant. |
| Availzye Machinist Pro | The platform's feeds & speeds calculator applies unit checks, blind-hole corrections, and exports verified RPM/IPM to G-code. |
What experienced machinists actually prioritize
The most common mistake in reaming isn't picking the wrong SFM. It's skipping the pre-flight checks and then chasing the problem with parameter changes that don't address the root cause.
Hole preparation, holder runout, and clamping rigidity solve the majority of reaming failures before the spindle ever turns. A machinist who drills a sloppy pilot hole, throws a reamer in a worn collet, and then wonders why the bore is oversized will spend an afternoon adjusting speeds and feeds without ever fixing the actual problem. Prepare the hole correctly, clamp it so it can't move, and verify TIR. Those three steps eliminate more scrap than any SFM adjustment.
The one "first fix" rule worth keeping on the wall: if chatter persists after checking runout and clamping, slow the spindle and raise the feed. It sounds counterintuitive, but it shifts the cutting regime from rubbing to shearing, and it works more often than increasing rigidity alone.
Availzye Machinist Pro: calculate reaming parameters and manage your tools in one place
Every reaming job involves the same sequence: calculate RPM and IPM, verify stock allowance, check for chatter risk, and get the values into your program. Availzye Machinist Pro handles all of it without switching between a spreadsheet, a separate calculator, and your CAM software.

The feeds & speeds calculator applies material-specific SFM, enforces unit validation, and outputs RPM, IPM, and recommended stock allowance in one step. The chatter prediction and tool deflection tools catch setup problems before they become scrap. Calculated parameters go straight to the G-code wizard so your reaming pass is programmed from verified numbers, not manual re-entry. The Tool Crib tracks regrind cycles and flags reamers that have hit their replacement threshold.
Plans run $9.99/month (Individual), $24.99/month (Small Shop), and $49.99/month (Team), all with a 7-day free trial. Start the trial at availzye-machinist-pro.com and run your first reaming calculation today.
Sources and further reading
The figures and recommendations in this guide draw from the following manufacturer and industry sources. Use them to validate starting values and go deeper on specific topics.
- Sandvik Coromant — Reaming: Primary authority on reaming as a precision finishing operation; covers key parameters, tool holders, runout, and regrind guidance. Best source for understanding why each parameter matters.
- Sandvik Coromant — How to ream a hole: Detailed coolant guidance including soluble oil concentration (~40:1) and delivery targeting. Go here for coolant-specific troubleshooting.
- CNCCookbook — Easy guide to reamer speeds and feeds: Practical source for the 50–70% SFM rule, 2–3× IPR rule, and chatter troubleshooting tactics. Good for quick cross-reference.
- FIRGELLI Engineering — Reaming Speed and Feed Calculator: Online calculator demonstrating the RPM = (SFM × 3.82) / D formula with unit validation. Useful for formula verification.
- Gammons Hoaglund — Reaming FAQ: Practical FAQ covering blind-hole speed reductions (10–20%), chip evacuation, and the counterintuitive chatter fix (reduce speed, raise feed).
- ICS Cutting Tools — Reaming Recommendations (PDF): Stock-allowance tables, feed/speed recommendations by material, and lubricant selection guidance. Best source for pre-drill sizing and material-specific lubricant choices.
- Rock River Tool — Reaming Speeds & Feeds (PDF): Carbide-tipped reamer SFM and IPR tables by material and diameter. Use for carbide-specific starting values.
- TWC Industrial — CNC Reaming Calculator: Interactive calculator with tolerance class selection (H6/H7/H8), stock allowance output, and cycle time estimation. Good for cross-checking Availzye Machinist Pro outputs.
For precision manufacturing context on dimensional control and small-feature finishing, this technical guide on precision in 3D details covers related concepts in tight-tolerance work.