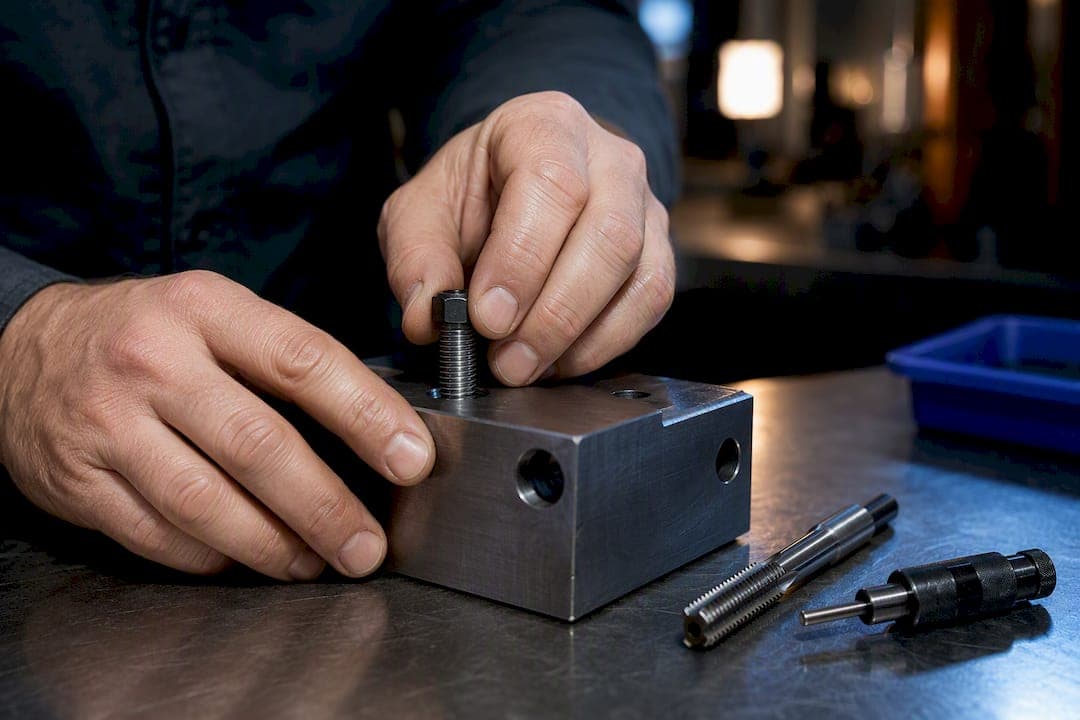
Use a material-based multiplier and target moderate thread engagement for general-purpose fasteners. Steel-into-steel joints usually run 1.0 to 1.5 times the bolt diameter; aluminum needs 1.5 to 2.5 times because it's softer. Run the full minimum-engagement calculation whenever the bolt and tapped material have very different strengths, or the joint is safety-critical. The formula and worked example are below.
TL;DR:
- Using material-specific multipliers, steel joints typically need 1.0 to 1.5 times the bolt diameter, while softer materials like aluminum require 1.5 to 2.5 times.
- Running the minimum thread engagement calculation is essential when materials have significantly different strengths or in safety-critical applications, especially with brittle or soft materials.
- Increasing thread engagement beyond 65% offers little strength benefit but significantly raises tapping torque and risk of tap breakage, especially in through holes.
- For critical or high-vibration joints, it is safer to over-engage or use thread inserts rather than rely solely on rule-of-thumb or minimal calculated lengths.
- Tools like the Thread Drill Calc can automate engagement checks, saving time and ensuring proper hole setup across different materials and joint conditions.
Table of Contents
- Thread Engagement Guide: Quick Rules of Thumb by Material
- How Do You Calculate Minimum Thread Engagement?
- Why Does 60–65% Thread Engagement Beat Going Deeper?
- Material-Specific Adjustments You Need to Know
- Shop Checklist: Verifying Thread Engagement Before Assembly
- What Standards and Calculators Should You Cross-Check?
- How Availzye Machinist Pro Speeds Up Engagement Verification
- What Machinists Get Wrong About Thread Engagement
- Try the Thread Drill Calc Before Your Next Job
- Sources
Thread Engagement Guide: Quick Rules of Thumb by Material
Before you touch a calculator, most shops start with a multiplier applied to bolt diameter. It's fast, it's been field-tested for decades, and it covers the vast majority of general fastening work.
Common multipliers by tapped (internal) material, per the Component Solutions Group thread engagement chart:
- Steel (medium/high carbon): 1.0× diameter
- Low-carbon steel: 1.2× diameter
- Gray cast iron: 1.5× diameter
- Aluminum alloys: 1.5× diameter (softer alloys push toward 2.0×)
- Soft plastics: up to 3.0× diameter
Take a 1/2 inch bolt as your reference. Into steel, you're looking at roughly 0.5 inches of engagement. Into aluminum, that climbs to 0.75 to 1.0 inches. Into a soft plastic housing, you could need 1.5 inches or a thread insert instead.
The multiplier scales with diameter, not with load directly, so a 1 inch bolt into aluminum needs proportionally more engaged length than a 1/4 inch bolt in the same material. When in doubt, or when the tapped material's shear strength is a wildcard, don't lean on the chart alone. Run the calculation below.
How Do You Calculate Minimum Thread Engagement?
The rule of thumb works fine until the bolt and the tapped material have very different strengths. That's when you need the actual formula, not a shop chart.
The standard minimum-engagement equation, as laid out by Engineers Edge, compares the bolt's tensile stress area against the shear area of the internal threads:
- Define the terms: le is minimum engagement length; At is the bolt's tensile stress area; J is a joint strength ratio comparing the bolt's material shear strength with the tapped material's shear strength.
- Find J: if the tapped material is weaker than the bolt (aluminum housing, steel bolt), J exceeds 1.0, and le increases proportionally.
- Solve for le: le = (At × J) / (0.5 × π × Dmin × [0.5 + 0.57735 × n × (Dmax − Emin)])
Here's a worked example: a 1/2 inch, 13 TPI (UNC) steel bolt tapped into 6061-T6 aluminum. Steel's shear strength is roughly triple that of 6061-T6, so J lands around 3. Plugging that into the equation typically pushes le to somewhere between 0.75 and 1.0 inches, which lines up almost exactly with the 1.5–2.5× rule of thumb.
Real numbers, one caveat: the equation assumes clean, complete threads. In practice, plating buildup, incomplete lead threads at the hole's start, and worn tap edges all eat into effective engagement, so most engineers add a margin rather than cutting to the exact calculated minimum.
Assumptions worth flagging every time: coatings add thickness that changes pitch diameter, the first one to two threads at the entrance rarely carry full load, and core-thread condition (burrs, chatter marks) reduces effective shear area even when the calculated length looks fine on paper.
Why Does 60–65% Thread Engagement Beat Going Deeper?
Percentage of thread engagement is a different measurement from engagement length. It describes how much of the full theoretical thread profile your tap drill actually cuts, and it's controlled almost entirely by pilot hole diameter.
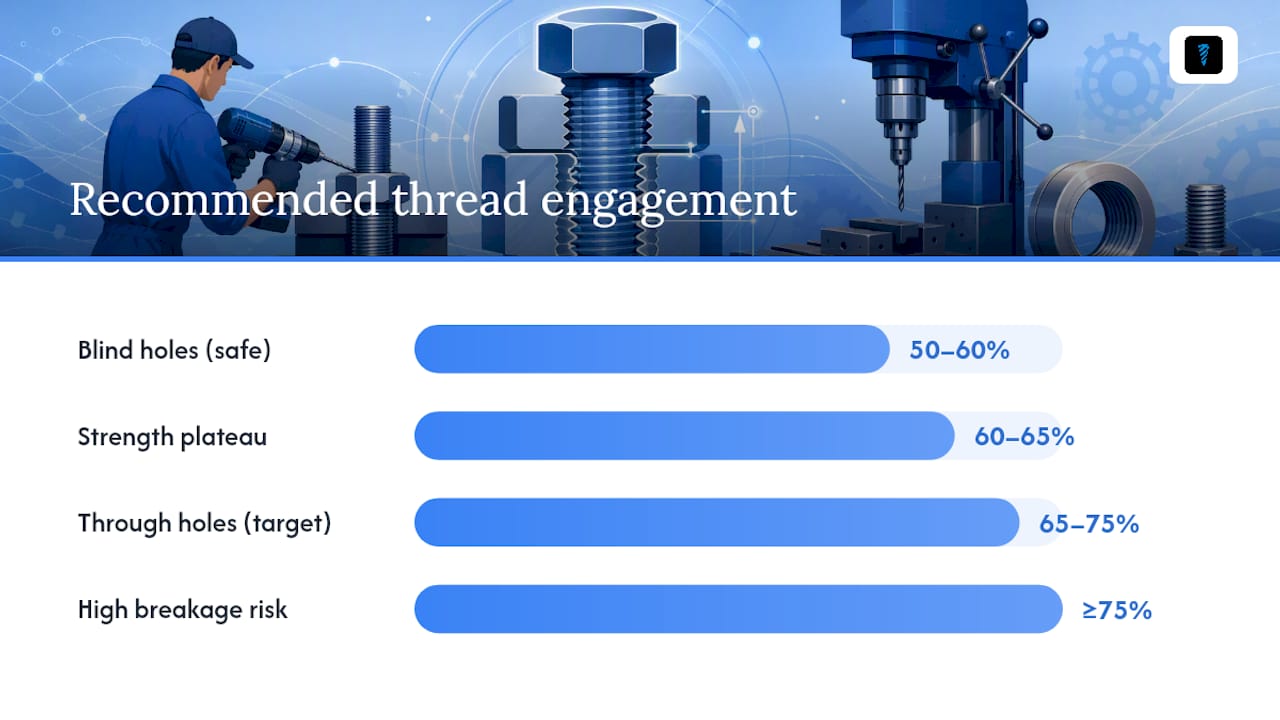
Here's the trade-off that surprises a lot of newer machinists: pushing from 60% to 75% engagement barely improves joint strength, but it can spike tapping torque enough to snap taps regularly, according to ToolGrit's tap-drill guidance. Strength gains plateau around 60–65%, while the risk curve for tap breakage keeps climbing.
Through-hole practice versus blind-hole practice:
- Through holes: target 65–75% engagement; chips clear freely, so higher percentages are more forgiving.
- Blind holes: drop to 50–60% and use a spiral-point (gun-nose) tap to push chips ahead, or a spiral-flute tap if chip evacuation upward is critical.
- Blind-hole depth: always drill 3 to 4 threads deeper than the required engagement so the tap isn't forced to bottom out mid-cut.
Pro Tip: If you're snapping taps in blind aluminum or stainless holes, check your percentage before you blame the tap. Dropping from 75% to 55% engagement often cuts tapping torque enough to save the job without meaningfully weakening the joint.
For quick lookups without doing the math by hand, a tap drill size chart saves time on the floor.
Material-Specific Adjustments You Need to Know
Rules of thumb are only useful if you adjust them for what's actually in the vise. A few materials deserve special handling every time.
- Aluminum: use 1.5–2.5× diameter. Lower shear strength means steel bolts will strip aluminum threads long before the bolt fails, so extra length compensates.
- Stainless steel: work hardening is the enemy here. Reduce your percentage target slightly, drop cutting speed, and use spiral-flute taps with cutting fluid rated for stainless.
- Cast iron: brittleness matters more than shear strength. Stick close to the 1.5× multiplier, but expect chip breakage patterns different from steel.
- Plastics and die-cast alloys: deep engagement alone often isn't enough. Past a certain load, a thread insert outperforms any amount of extra depth, especially in repeated-assembly applications.
- Titanium: treat it like stainless but more conservative. Slower speeds, generous lubrication, and don't chase maximum percentage.
Shop Checklist: Verifying Thread Engagement Before Assembly
Getting the math right doesn't help if the hole was drilled wrong or nobody checked the result. Run through this before signing off on a threaded feature:
- Set depth first. For blind holes, drill 3–4 threads deeper than your calculated le to give the tap room to finish without bottoming out.
- Gauge it. Use go/no-go plug gauges to confirm pitch diameter is within ASME B1.1 tolerance before you trust the engagement number.
- Measure engaged length physically. Check visible threads past the nut face or use a depth mic on a sample part, not just the print.
- Torque-check on critical joints. A properly engaged thread should reach spec torque without the bolt yielding first.
- Document it. Write the chosen engagement length and assembly torque on the job traveler, especially if you deviated from the print's nominal value.
Pro Tip: Never assemble a threaded joint by feel alone on a critical part. A bolt that "feels tight" at 40% engagement can still back out under vibration long before it ever shows visible thread damage.
What Standards and Calculators Should You Cross-Check?
ASME B1.1 and related standards define the allowable tolerances for pitch diameter and thread class, which directly affects how much contact area your engagement calculation assumes. Thread class isn't cosmetic. A 2A/2B fit and a 3A/3B fit change your effective shear area even at identical nominal engagement length.
Cross-check your numbers against published thread charts or an Engineers Edge minimum engagement calculator before finalizing a print. For high-vibration assemblies, aerospace brackets, or anything where a stripped thread means a field failure, loop in an application engineer rather than trusting a rule of thumb alone.
How Availzye Machinist Pro Speeds Up Engagement Verification
Running the minimum-engagement formula by hand works, but it's slow when you're checking multiple hole sizes across a job. The Thread Drill Calc in Availzye Machinist Pro computes minimum engagement and cross-references pilot drill sizes against material multipliers automatically, so you're not re-deriving J-values on a shop napkin.
Pair that with the Job Tracker to log which engagement length and tap were used on a given part, and the Tool Crib to track tap wear and catch a dulling tap before it snaps mid-hole. The AI Assistant can suggest a starting parameter set when you're working an unfamiliar alloy, which cuts down on trial-and-error test cuts.
What Machinists Get Wrong About Thread Engagement
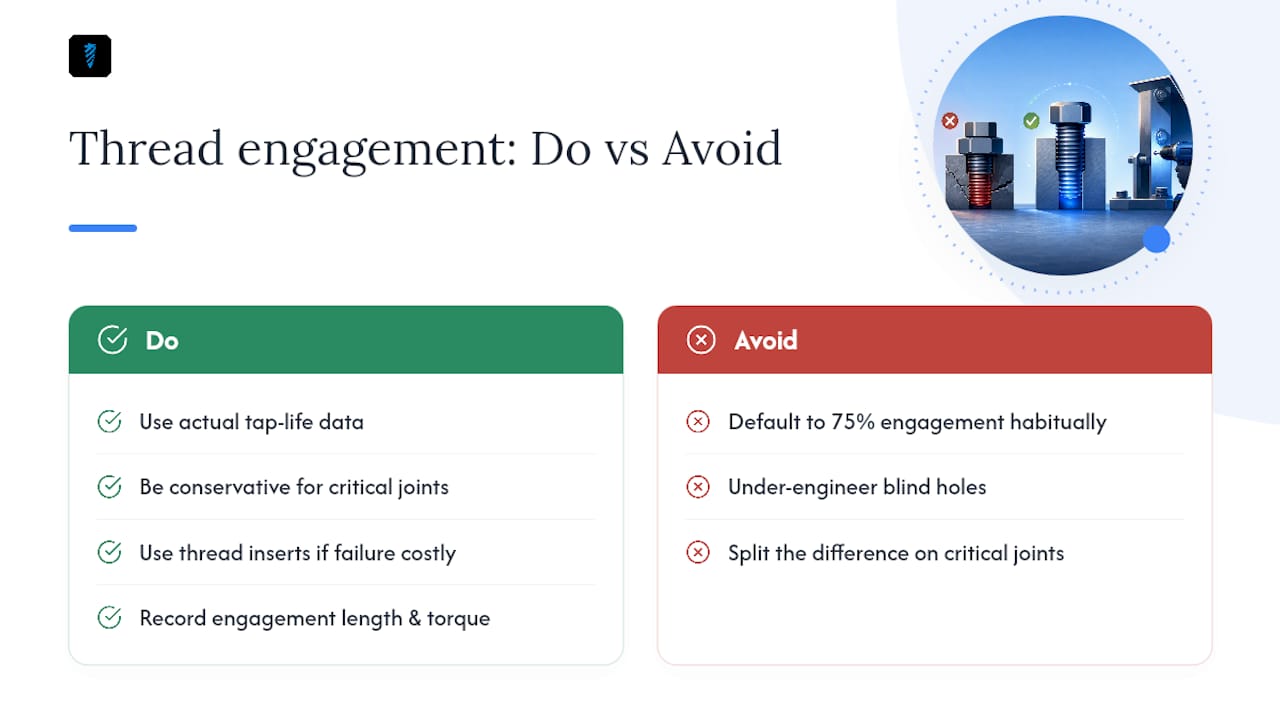
Most shops either over-engineer every hole to 75% engagement out of habit, or under-engineer blind holes and wonder why taps keep snapping. Neither extreme is smart. For production runs, prioritize your actual tap life data over a textbook percentage. If a tap survives 500 holes at 60% engagement, that number should guide your process more than a chart entry.
Where I'd push back on convention: for safety-critical joints, don't split the difference. Go conservative on engagement, or use a thread insert when the cost of a single failure outweighs the extra machining time. Whatever you land on, write the engagement length and torque spec on the job paperwork. Six months from now, nobody will remember why that hole was cut the way it was.
— Availzye
Try the Thread Drill Calc Before Your Next Job
A Thread Drill Calc tool gives you a faster path from formula to finished part than working through the equation by hand for every hole size on a print. It computes minimum engagement, cross-references drill sizes against the material multipliers covered above, and outputs job-ready parameters you can hand straight to the operator.

If you're setting up a new job with mixed materials or a critical joint, run the numbers through the Thread Drill Calc before you cut a single test hole. A 7-day free trial gets you access to the full calculator suite, including the tap tables and tool crib logging that keep engagement decisions consistent across a shift, not just in one machinist's notebook.
Sources
- Tap drill & thread engagement guide — ToolGrit
- Minimum thread engagement equation and calculator — Engineers Edge
- Thread engagement chart: Engineering standards for bolted joints — Component Solutions Group