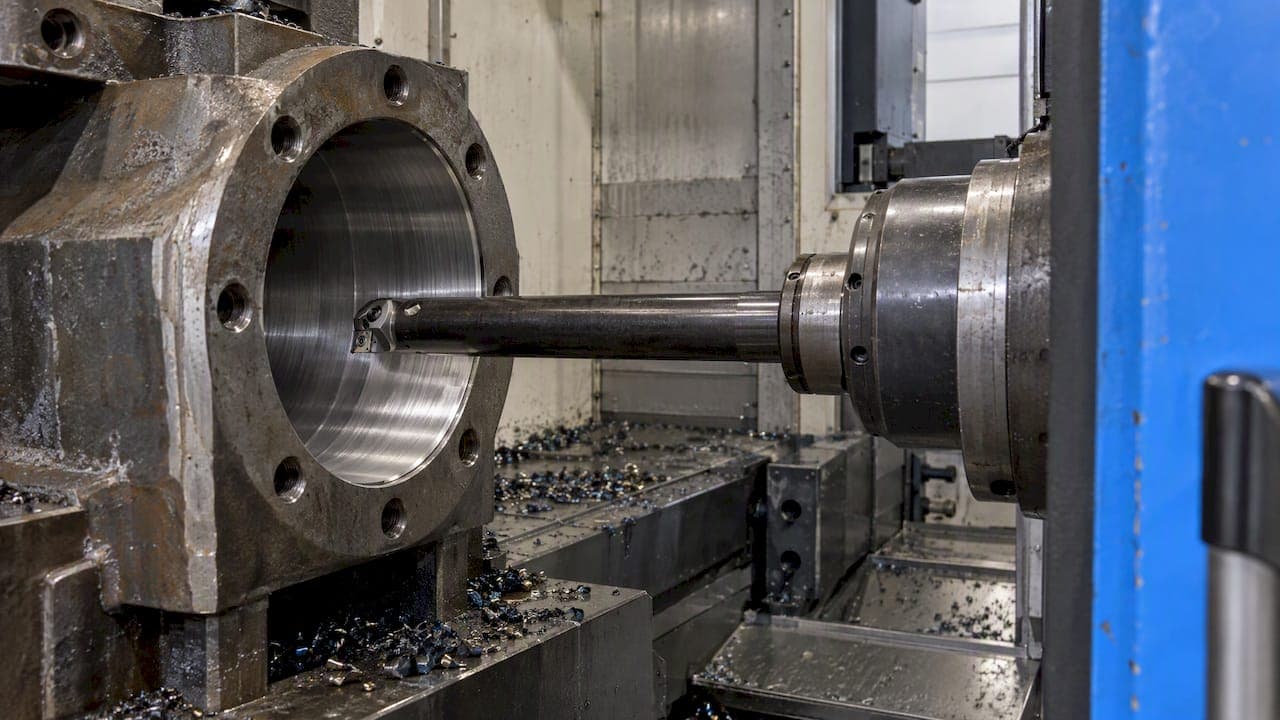
Boring chatter almost always comes down to a bar that is too long, too loose or cutting too lightly. Fix it in that order. Shorten the overhang, confirm the tool sits on center and the insert is sharp and right for the job, support the part, and only then change speed, feed and depth of cut in small steps, one at a time. This guide walks through that sequence, with the overhang numbers, the cutting-data moves and the record keeping that tell you which change actually worked.
TL;DR
- Start with the bar: the most common cause of boring chatter is an overly long bar, so cut overhang first and use the largest diameter that still clears chips.
- Check the basics before touching the program: centerline height, insert condition and geometry, runout, and how well the part is held.
- Change one cutting variable at a time, by about 10%, and write down the result. Light finishing passes are often the worst case, so try more feed, not less.
- Past roughly 4 to 6 times the bar diameter, stop fighting it and move to a carbide or damped bar.
- Log every trial. A pattern from three jobs beats a guess on the fourth.
Table of Contents
- What boring chatter looks and sounds like
- Why boring is so prone to chatter
- Step 1: Fix overhang and bar choice first
- Step 2: Check centerline, insert and chip control
- Step 3: Check workholding and the part
- Step 4: Adjust speed, feed and depth of cut
- A repeatable troubleshooting sequence
- When to switch to a damped or modular bar
- Our perspective: log it, don't remember it
- Keep the numbers with the job
- FAQ
- Sources
What boring chatter looks and sounds like
Chatter is self-excited vibration. The tool leaves a wavy surface on one pass, the next pass cuts into that wave, and the force variation feeds the vibration. The academic literature on boring describes this regenerative mechanism as being tied to variable chip thickness and changing cutting forces.
At the machine you will usually notice:
- A loud squeal, howl or rhythmic knocking that was not there on the previous part.
- Repeating waves or a faceted look inside the bore, often with a finish that changes as spindle speed changes.
- Insert edges that chip or wear early, and a bore that measures out of round or tapered.
Two quick tests separate chatter from other problems. First, change spindle speed by about 10% and listen: true chatter changes pitch, gets worse or goes away, while a dull insert or a bad bearing sounds much the same. Second, look at the marks. Spiral feed lines at a steady pitch point to feed and nose radius, not vibration. If you need help reading marks across a whole surface, our surface finish troubleshooting guide covers it.
If the finish problem shows up on every tool and every operation, look at the machine before the boring bar. Haas service documentation lists backlash, spindle or gearbox vibration, machine level, turret alignment and clamping, and chuck or fixture balance among the things to rule out when separating chatter from a machine fault.
Why boring is so prone to chatter
A boring bar is a cantilever. It has to reach into a hole, so it is long compared with its diameter, and that length is what makes it flex. Boring bars are especially prone to chatter because of this, and Kennametal calls an overly long bar the most common cause.
Haas lists the usual suspects for lathe chatter in its lathe chatter troubleshooting guide: excessive tool wear or stickout, too-light chip load, a tool off centerline, an improper insert, the workpiece moving in the chuck, and insufficient workpiece support. Other shops add runout from poor tool holding and dull tools that raise cutting forces to the list.
There is one more factor that catches people out. Research on boring stability suggests that, unlike turning or milling, the critical case is often the finishing pass, where low feed and shallow depth reduce the damping effect of the cut. That is why a bar can rough a bore quietly and then sing on the final pass.
Step 1: Fix overhang and bar choice first

Overhang is the biggest lever you have, and it costs nothing. Haas notes that a 10% reduction in length-to-diameter ratio gives a 25% increase in tool stiffness. Stubbing the tool up to the shortest workable length is a first-line fix in the same guide.
Sources do not agree to the decimal on how far a bar can reach, so treat these as starting ranges:
| Bar type | Typical stable overhang | Source |
|---|---|---|
| Steel | Up to 3× diameter | Haas and Practical Machinist (which also cites up to 4×) |
| Solid carbide | 5× to 6× diameter | Haas (5×), Practical Machinist (up to 6×) |
| Damped (anti-vibration) | 10× or more | Practical Machinist |
If you must exceed the limit for your bar type, Haas advises reducing depth of cut, feed rate or spindle speed. Practical Machinist's guidance is blunter: beyond 6× an anti-vibration bar is required. In practice, the conservative reading is the safe one. Start at the lower figure, and treat anything past it as a reason to change bar type.
A few related choices:
- Use the largest bar diameter that still leaves room for chips to leave the bore. Stiffness rises quickly with diameter.
- Choose the largest coupling size available, and where the machine allows it, a flange-contact interface such as Coromant Capto or HSK, per Sandvik Coromant's boring guidance.
- Check the holder for fretting and the tool for runout. Haas lists both under its first checks, along with making sure the fixture actually supports the part.
Step 2: Check centerline, insert and chip control
Once the bar is as short and stiff as it can be, go through the cutting edge.
Centerline. The tool needs to be set on center. A tool below center is a classic cause of lathe chatter, and one traditional rule of thumb is to set the tool dead center and keep overhang within 6 times the bar diameter. Verify height with the bar clamped at its working length, because the bar drops as it deflects and as the holder seats.
Insert geometry. For boring, a positive clearance angle and a smaller nose radius lower radial force and the tendency to vibrate, according to Practical Machinist's vibration-free boring article. The same piece notes that negative-rake inserts, strong in roughing, make chatter more likely in boring. A sharp positive insert with a modest nose radius is usually the better first try inside a bore.
Insert wear. A dull edge raises cutting force and pushes the bar. Index or replace before you start experimenting with speeds, or you will chase a problem that a new edge solves.
Chips. Chip control matters, especially in blind holes. Sandvik notes that chip jamming harms hole quality and tool life and can lead to insert breakdown. A packed chip adds force and noise that looks like chatter. Check coolant direction and clearance for chips before blaming the bar.
Step 3: Check workholding and the part
A rigid bar in a loose part still chatters. Look at:
- Jaw pressure and whether the part moves in the chuck. Haas lists workpiece movement in the chuck as a chatter cause.
- Thin walls or long unsupported sections. Soft jaws bored to size, a steady rest or a support behind the cut all help.
- Chuck, part and fixture balance, particularly at higher spindle speeds.
If the part is thin-walled, clamp lighter and take the finishing pass with more care for support rather than more RPM. Distorted jaws give you an out-of-round bore that no cutting-data change can fix.
Step 4: Adjust speed, feed and depth of cut

Only now should you touch the program. Kennametal's advice is to change one variable at a time, by a small amount such as 10%, and to document the effect on stability. If a change makes things worse, restore the earlier setting before you try the next one.
What to try, in a sensible order:
- Increase feed. Both Kennametal and Sandvik suggest trying more feed. A light chip load rubs rather than cuts, which adds vibration. This is counterintuitive but often works.
- Set the depth of cut for the finishing pass at or above the nose radius. Sandvik gives this as a good starting depth for finishing passes. Skimming a few thousandths with a large radius is a recipe for chatter.
- Move spindle speed in steps of about 10%. Stability depends on spindle speed and depth of cut together, and stability lobe diagrams show stable pockets at particular speeds. A small RPM change can drop you into one. Our piece on stability lobes and RPM pockets explains how to find them.
- Reduce depth of cut if you still cannot get quiet, since radial force falls with it.
For reference, Sandvik's recommended fine-boring starting speeds are 120 m/min for short steel and carbide bars with inserts, 90 m/min for long steel bars and 60 m/min for solid carbide bars with ground geometry. That is about 394, 295 and 197 surface feet per minute. Use them as a starting point and let the sound guide you from there. If you need to recalculate RPM and feed after a change, the feeds and speeds guide shows the math.
A repeatable troubleshooting sequence
Here is the order we would work through at the machine.
- Confirm it is chatter. Change spindle speed by about 10% and listen. Rule out machine faults if every tool shows the same problem.
- Shorten the bar. Pull it back in the holder until the overhang fits your bar type's range.
- Check runout and holder condition. Look for fretting and check the indicator reading at the tip.
- Verify centerline. Set at working length.
- Change the insert. Fresh, positive clearance, modest nose radius.
- Confirm part support. Jaws, steady rest, balance.
- Adjust one cutting variable by 10%. Feed first, then depth, then speed.
- Write down each result. Keep the good setting, restore the bad one.
- If it persists, change the tool. Move to carbide or a damped bar, or a modular system.
Skipping to step 7 is the most common mistake. People tune parameters on a bar that is simply too long, then conclude the job cannot be done.
When to switch to a damped or modular bar
If the bar needs to reach beyond roughly 4 to 6 times its diameter, or if you have run the sequence and chatter remains, a different tool is the honest answer. Sandvik suggests considering a damped boring bar or a modular system when chatter persists, and Practical Machinist's figures put damped bars at 10 times diameter or more.
Also think about the next job. A bar that is just barely adequate will chatter again when the material batch changes or the insert wears. For deep bores, price the damped bar against scrap and rework. It is usually the cheaper route.
Our perspective: log it, don't remember it
We build software for machinists, and the pattern we see is that chatter gets solved at the machine and forgotten by the next shift. The operator who found that a 10% feed increase on a 4×D steel bar fixed the finishing pass takes that with them. The next person starts from scratch.
The physics are not mysterious. Stiffness depends heavily on length-to-diameter ratio, force depends on chip thickness, and stability depends on where speed and depth land relative to the lobes. What costs shops time is trial and error without records. That is why we put chatter prediction, tool deflection and feeds and speeds calculators in the same place as job tracking, tool life logs and shift notes. You can estimate deflection for a given overhang before you cut, and then record what worked against the job and the tool.
Our advice: pick the overhang ratio, insert and cutting data that worked, and write them on the job record. Do it the same day. A setup that was quiet once will be quiet again if you can find it.
— Availzye
Keep the numbers with the job
Availzye Machinist Pro puts the calculators for feeds and speeds, tool deflection, chip thinning and chatter prediction next to a job tracker, tool crib and shift notes in one cloud-based app. That means the boring setup that finally ran quiet can be stored with the work order instead of on a scrap of paper. Plans are Individual at CAD 9.99 per month, Small Shop at CAD 24.99 per month and Team at CAD 49.99 per month, each with a 7-day free trial. You can see them on the plans page.

If your chatter problems are mostly in milling, the same logic applies. Our guide to stopping milling chatter with stability lobe checks shows how.
FAQ
What is the most common cause of chatter when boring?
An overly long bar is the most common cause, according to Kennametal. Excessive tool wear, a tool off centerline, an unsuitable insert, a light chip load and poor part support follow closely. Check overhang first because it is free to fix.
How far can I stick out a boring bar?
As a starting point, steel bars are stable to about 3 times their diameter and carbide bars to about 5 times, per Haas. Practical Machinist cites up to 4× for steel and 6× for carbide, and 10× or more for damped bars. Use the lower figures first and move to a damped bar when you must go beyond.
Should I increase or decrease feed to stop boring chatter?
Try increasing it. Both Kennametal and Sandvik recommend more feed, because a very light chip load rubs instead of cutting and promotes vibration. Change it in steps of about 10% and note what happens.
Why does my boring bar only chatter on the finishing pass?
Finishing passes use low feed and shallow depth, which reduce the damping the cut provides. Research on boring stability identifies this as often the critical case. Try a depth of cut at or above the nose radius and a modest feed increase.
Sources
- Lathe Chatter - Troubleshooting (Haas)
- Mill Spindle - Troubleshooting Guide (Haas)
- Mechanical Service Manual (Haas)
- Boring Bar Basics & Anti-Vibration Strategies (Kennametal)
- How to apply boring (Sandvik Coromant)
- Achieving Vibration-Free Boring and Turning (Practical Machinist)
- Avoid These 5 Mistakes Causing Lathe Chatter (Harvey Performance)
- Chatter reduction in boring process (ScienceDirect)
- Modelling chatter stability in boring operations (ISMA 2014)
- Using Stability Lobe Diagrams to Control Chatter (CTE)