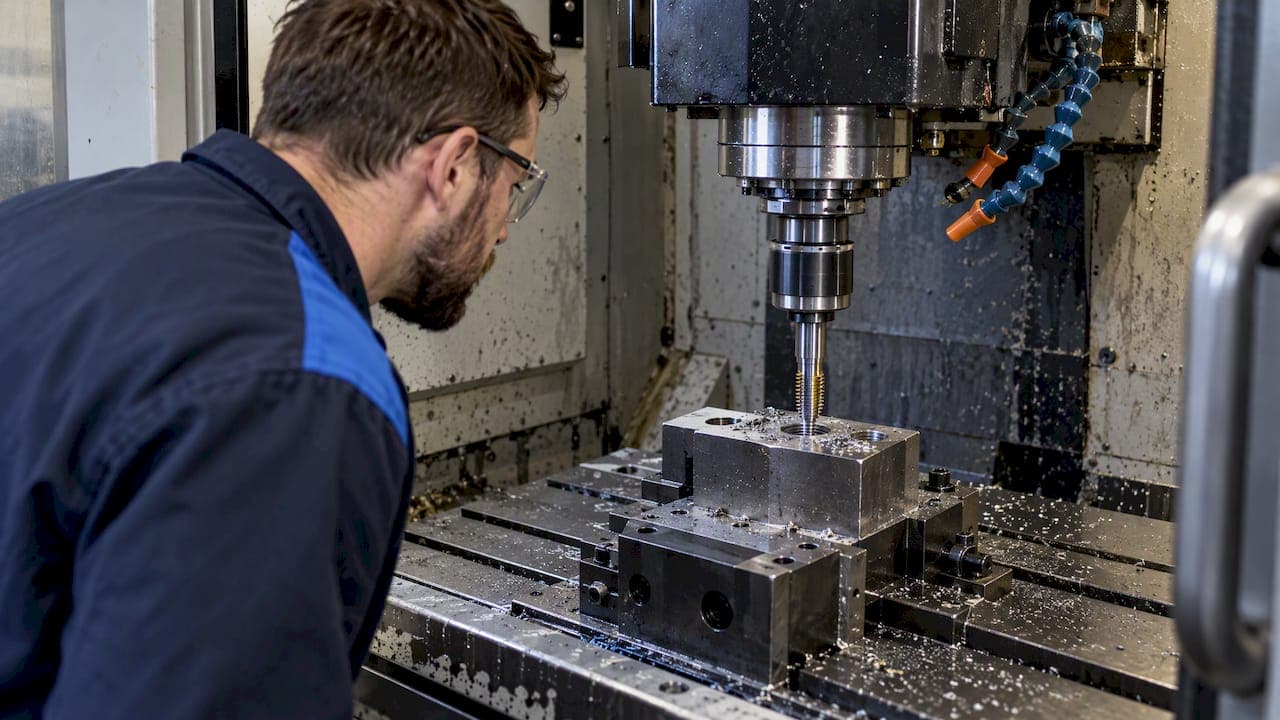
Use G84 (or your builder's variant, G84.2) to start rigid tapping, and cancel it with G80 once the hole is done. Before you run anything live, confirm your control's rigid-tap option is actually enabled and that your S and F values match the tap's lead exactly. Test the program in the air or on a sacrificial block first: an unsynchronized rigid tap snaps taps fast.
TL;DR:
- Verify that F and S values match the tap's lead precisely, and confirm that rigid-tap mode is truly enabled on your control before running live.
- Remember that G84 is modal and remains active until G80 is issued, so failing to cancel it can cause unintended tap cycles during non-threading moves.
- On Haas controls, setting 133 and the spindle orientation pause are critical for proper rigid tapping, while Fanuc and Mach4 require control-specific confirmation of mode activation.
- Use appropriate G-code modes, such as G94 or G95, to align feed rates with spindle RPM or thread pitch, minimizing synchronization errors.
- Test the program in air or on sacrificial material and run a single dry cycle to check spindle pause and Z-axis synchronization before full production.
Table of Contents
- How rigid tapping synchronizes the spindle and Z-axis
- Control-specific activation: Fanuc, Haas, and Mach4/MachPro
- Annotated rigid tapping G-code examples you can adapt
- Calculating feed and spindle sync so the math actually matches
- Peck tapping and chip control strategies
- Troubleshooting broken taps and desynchronization
- Pre-run setup checklist before you cut
- What experienced machinists get wrong about rigid tapping
- Verify your rigid tapping setup before you cut metal
- FAQ
- Sources
How rigid tapping synchronizes the spindle and Z-axis
Rigid tapping works because the controller treats the spindle like a servo axis instead of a free-spinning motor. The spindle and the Z-axis move in lockstep, with the machine computing Z position directly from spindle rotation rather than relying on a floating tap holder to absorb the mismatch. That is what separates rigid tapping from a conventional spring-loaded tapping head: there is no compensating float, so the math has to be right before you ever touch the green button.
A standard G84 cycle uses a handful of parameters, and getting any one wrong changes the whole result:
- Z: the final tap depth, usually the bottom of the hole or thread.
- R: the retract or reference plane where rapid motion ends and controlled feed begins.
- F: the feed rate, interpreted as units per minute or units per revolution depending on whether you are in G94 or G95 mode.
- S: spindle speed, which must correspond mathematically to F and the tap's thread pitch.
- Q: incremental peck depth, used only when pecking is required to clear chips.
G84 is modal: once called, it stays active for every subsequent X/Y position in the block until you issue G80 or another motion mode. That convenience is also the most common beginner trap. Forget G80 after the last hole, and the next positioning move can trigger an unintended tap cycle in open air or, worse, into material that was never meant to be threaded.
Control-specific activation: Fanuc, Haas, and Mach4/MachPro
Rigid tapping is not a universal, plug-and-play feature. Activation and even the G-code itself vary by control and by machine builder, so the same program will not always behave the same way on two different machines.
- Fanuc: Activation is builder-dependent, and M29 is common but not universal. Always check the machine builder's documentation rather than assuming a generic Fanuc manual applies. The reliable test is visual: the spindle should visibly pause and orient before Z starts descending. If you do not see that pause, the machine is not in rigid-tap mode, and you should not proceed to a live cut.
- Haas: G84 behavior on Haas controls follows its own documented formulas, and Setting 133 (REPT RIGID TAP) governs whether the spindle re-orients between repeated pecks in a multi-peck cycle. That setting matters more than most programmers expect when deep holes require several Q increments.
- Mach4/MachPro and similar controls: Some mappings use G84.2 instead of G84, and F can be interpreted as thread pitch in a units-per-revolution mode or as a straight units-per-minute feed. Confirm which interpretation your post processor assumes before trusting a borrowed program.
Because these differences are real and machine-specific, the only safe habit is to verify behavior on your exact control before assuming a tutorial or forum snippet will run as written.
Annotated rigid tapping G-code examples you can adapt
These examples are illustrative starting points, not universal drop-in code. Confirm your control's parameter interpretation first.
- Single-hole inch tap (G94, units/min mode):
G94sets feed in inches per minute.S500 M03starts the spindle.G84 Z-0.75 R0.1 F10.0starts the tap: Z is the full depth, R is where feed begins, and F is calculated from RPM and threads per inch.G80cancels the cycle immediately after. - Single-hole, feed-per-rev mode (G95): Switching to
G95let you setFdirectly as the thread pitch, which is often more intuitive for tapping.G95 S500 M03followed byG84 Z-0.75 R0.1 F0.05ties feed to spindle rotation one-to-one with the pitch. - Metric example: For a metric tap with a 1.5 mm pitch at 600 RPM,
G95mode lets you writeF1.5directly, since feed-per-rev mode uses pitch as the feed value without extra conversion math. - Multi-hole pattern: List each X/Y position followed only by the Z value; G84 stays modal and repeats the full synchronized cycle at each location.
X1.0 Y1.0 Z-0.75thenX2.0 Y1.0 Z-0.75reuse the same R, F, and S from the first G84 call. End the block withG80after the final hole, every time, with no exceptions. - Peck tapping example: Adding
Q0.15to the G84 line breaks the tap into 0.15-inch increments, retracting partially between pecks to clear chips from deep or gummy holes.
Calculating feed and spindle sync so the math actually matches
Rigid tapping fails most often not because of bad code structure but because F and S do not actually correspond to the tap's lead. There are two standard approaches, and mixing them up is the single most common calculation error.
- Units-per-minute mode (G94): Feed equals RPM divided by threads per inch, so a tap running at 500 RPM with 20 threads per inch needs F = 500 ÷ 20 = 25 inches per minute.
- Units-per-rev mode (G95): Feed is simply the thread pitch itself, so a metric tap with a 1.5 mm pitch needs only F1.5, regardless of RPM.
- Rounding: Haas sample programs show both G94 and G95 worked examples; round F to match your control's decimal precision, never upward if it would overshoot the exact lead.
Following the tap manufacturer's recommended RPM reduces failed threads more reliably than fine-tuning G-code parameters alone, according to vendor tapping guidance. A tap running faster than its coating and geometry support will strip or gall threads even with flawless synchronization math. If you want to skip the manual arithmetic, feeds and speeds calculators can cross-check your numbers before you commit to a live run.
Peck tapping and chip control strategies
Peck tapping earns its place in deep holes, blind holes with poor chip evacuation, or soft, stringy materials that pack chips into the flutes instead of breaking cleanly. One-shot rigid tapping works fine for shallow through-holes in free-machining materials, but anything past roughly three times the tap diameter in depth deserves a second look at pecking.
- Add Q as an incremental peck depth; the control retracts partially between each pass to let chips clear.
- On Haas and similar controls, Setting 133 (REPT RIGID TAP) determines whether the spindle re-orients at each peck, which affects cycle time and tap wear.
- Coolant through the tool, spiral-point taps for through-holes, and spiral-flute taps for blind holes all reduce the chip-packing problem before it starts.
When torque or hole diameter gets large enough that tap breakage becomes a real risk, thread milling is worth considering instead of pushing a tap past its comfort zone.
Pro Tip: Start peck depth conservative on a new setup, around one tap diameter, then open it up once you confirm clean chip evacuation.

Troubleshooting broken taps and desynchronization
Most rigid tapping failures trace back to one of three things: the spindle never actually paused before Z moved, the F/S math does not match the tap lead, or the hole and tap geometry were wrong from the start.
- Confirm rigid-tap is actually enabled on the control, not just assumed from a similar machine.
- Recheck the S and F calculation by hand, matching the mode (G94 or G95) your program actually uses.
- Watch for the spindle orientation pause before Z descent; no visible pause means the machine never entered rigid-tap mode.
- Inspect hole diameter against the tap drill chart and check the tap's flutes and point for wear or chipping.
- On retrofit or lower-cost machines, verify whether rigid tapping uses encoder feedback or a computed index, since that difference changes how desynchronization shows up.
- Run a single-axis dry run in the air first, then a single live hole, watching spindle behavior closely before committing to a full production run.
Pre-run setup checklist before you cut
- Verify drill size, hole chamfer, and tap condition against a tap drill size reference.
- Confirm G94 versus G95 mode, correct S and F values, and that G80 appears after the last tap in the program.
- Check tool holder rigidity, workholding stability, and coolant delivery to the tap.
- Run one test hole live before releasing the program to full production.
What experienced machinists get wrong about rigid tapping
The recurring mistake is not a coding error but a verification gap: programmers trust that rigid tapping is enabled because the G-code ran without an alarm, not because they actually watched the spindle pause. A clean-looking program with mismatched F and S will still snap a tap. Running feed and tap-lead numbers through a thread drill calculator before cutting catches most of these errors in seconds instead of after a broken tap.
— Availzye
Verify your rigid tapping setup before you cut metal
We built Availzye Machinist Pro so you never have to do tap-lead math by hand or second-guess a borrowed G-code snippet from a forum thread.

- Our thread drill calculator checks tap drill sizing and thread engagement in seconds.
- Our G-code generator produces and verifies rigid tapping snippets with correct F and S math built in.
- Our feeds and speeds tools help confirm spindle and feed synchronization before a program is loaded into the control.
Start your trial at Availzye Machinist Pro.
FAQ
Is G84 rigid tapping?
G84 is the canned cycle used for tapping, and it becomes rigid tapping specifically when your machine's rigid-tap option is enabled so the spindle and Z-axis move in true synchronization. Without that option active, G84 may run as a conventional floating tap cycle instead.
What is G76 in G-Code?
Threading canned cycles on lathes, separate from the G84 rigid tapping cycle covered in this guide, vary by control and name, so always confirm against your machine's own documentation before programming them. Its exact parameters vary by control, so always confirm against your machine's own documentation before programming it.
What does G71 mean in G-Code?
Turning canned cycles used for rough stock removal on a lathe are unrelated to rigid tapping. Definitions can vary slightly between control brands, so check your specific machine manual for the exact parameter set. Definitions can vary slightly between control brands, so check your specific machine manual for the exact parameter set.
What is the difference between G71 and G72?
Certain lathe roughing cycles are generally applied to different turning orientations, with common variations used for outer or inner diameter roughing along the Z-axis versus facing-direction roughing. Exact behavior depends on the control, so consult your machine's programming manual for confirmation.
When should I use thread milling instead of rigid tapping?
Thread milling is worth considering for large-diameter threads or when machine torque and rigidity are limited, since it places far less torque on the tool than tapping does. It also avoids the catastrophic tap breakage risk that comes with unsynchronized rigid tapping.
Sources
- G84 Tapping Canned Cycle (Group 09) — Haas CNC
- Rigid tapping controller code for Fanuc — PracticalMachinist forum
- Rigid Tapping in Mach4/MachPro — HiCON / Vitalsystem manual