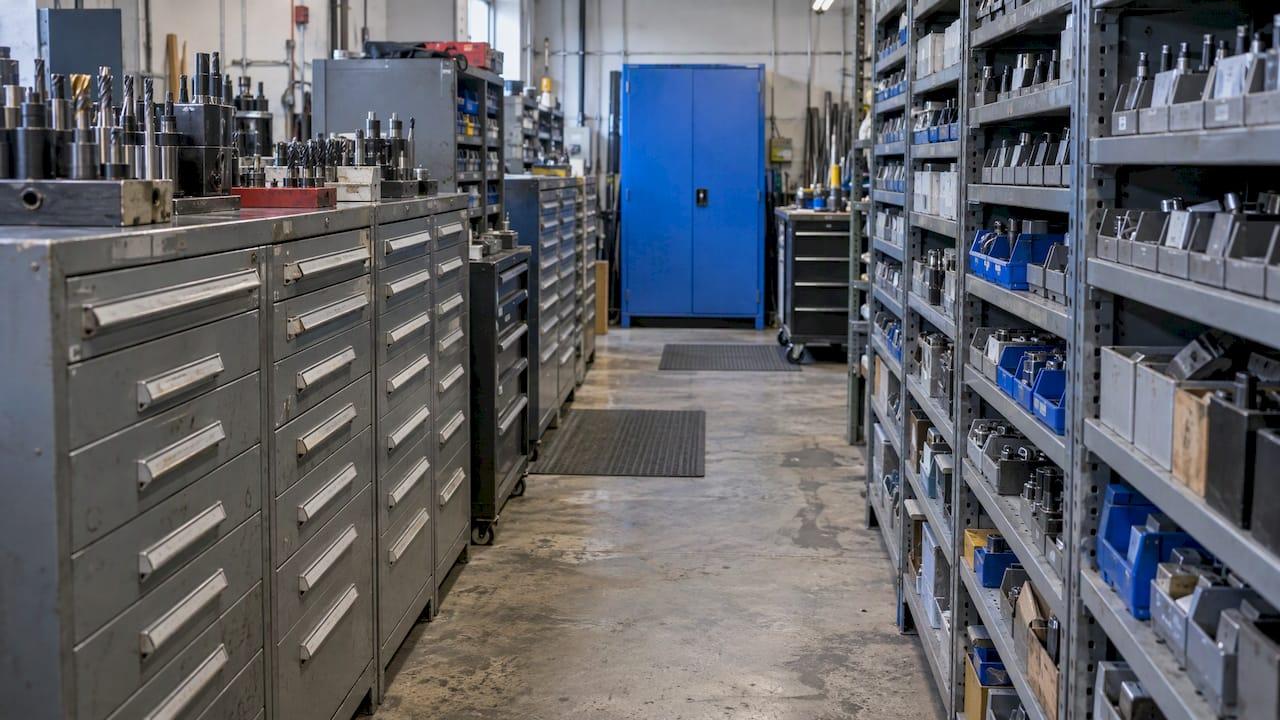
A bin location system gives every spot where you store something, whether a shelf, drawer or bin, its own short code, and records which item lives there. In a CNC shop that means an operator can walk to a tool, insert or fixture without asking anyone, and the crib knows what should be on each shelf. This guide shows how to build one: the code format, labels, fixed versus random storage, rollout steps and the upkeep that keeps it accurate.
TL;DR
- Give every storage spot a hierarchical code (zone, bay, shelf, bin), such as A-03-C-07, with the same number of characters in each part.
- Label the place, not the part. The label says where an item belongs; the inventory record says what it is.
- Use fixed locations for tools and consumables people grab at random times. Use random locations only where space is tight and volumes swing.
- Roll out in phases: one cabinet or wall first, then the rest, with a named owner for the crib.
- Keep records current at every checkout and return. A system that drifts is worse than none.
Table of Contents
- What a bin location system does in a machine shop
- Design the code before you buy a single label
- Fixed, random or hybrid: which storage logic fits
- How to set up a bin location system in a CNC shop
- Labels that survive a shop floor
- Layout ideas that pair well with bin codes
- Keeping the system accurate day to day
- Connecting bin locations to work orders
- Put your bin codes into a working tool crib
- FAQ
- Sources
What a bin location system does in a machine shop
A bin location is the address of the smallest storage spot you track. Warehouse guides describe it as a structured code combining zone, aisle, rack, shelf level and position, such as A-03-02-B for Zone A, Aisle 3, Rack 2, Level B. The same idea works in a tool crib, a bar stock rack or a fixture cage. You are just using a smaller version of it.

Why a shop cares: a missing tool is rarely lost. It is stored somewhere nobody remembers. The U.S. Army's Tobyhanna machine shop organized 25,000 tools using 6S, with shadow boards, labeled drawers and customized distribution centers. The Army reported shorter machine setup times and as much as two hours returned on individual tasks. That was a very large operation, but the mechanism is the same in a five-machine shop: when every item has one home, nobody searches.
A bin location system is also the base layer for other crib practices. Tool numbering, tool checkout, reorder points and cycle counts all assume you can say where a thing is supposed to be.
Design the code before you buy a single label
The code is the part you will live with for years, so spend your thinking time here.
Use four levels: zone, bay, shelf, bin
A common hierarchical format has four levels. Zone A is the aisle or area, A-03 is bay 3, A-03-C is the third shelf from the bottom, and A-03-C-07 is bin 7 on that shelf. The structure scales from one shelving unit to several buildings, so you will not outgrow it.
For a CNC shop, a practical mapping looks like this:
| Zone | What lives there | Example code |
|---|---|---|
| A | Cutting tools (end mills, drills, taps) | A-02-B-04 |
| B | Inserts and toolholders | B-01-A-12 |
| C | Workholding and fixtures | C-03-C-01 |
| D | Measuring tools and gauges | D-01-A-02 |
| E | Consumables (coolant, wipes, abrasives) | E-02-D-05 |
| F | Raw stock and job-in-progress | F-04-A-01 |
These zone letters are only an example. Choose what matches your floor and write the map down on one page.
Keep the format consistent and sortable
A few rules from warehouse practice save headaches later:
- Same length in every part. Write 03, not 3, so codes sort correctly in a spreadsheet and on a pick list. Software that sorts text otherwise puts A10 before A2, which is why leading zeros are recommended.
- Leave gaps. One professional guide suggests even numbers for aisles (02, 04, 06) so an aisle can be added later without renumbering. The same guide proposes grouping aisle numbers by storage type, such as small-parts shelving in one range and racking in another.
- Number shelves from the bottom up, starting at 1. That lets you add a shelf without resetting the scheme.
- Do not put part names in the code. A location label identifies where an item belongs, not what it is. Embedding names invites scanning errors and count drift, and it breaks the moment you change the tool in that bin.
If you also run a tool numbering scheme for the controller, keep the two separate. The tool number says which tool; the bin code says where it sits. Our tool numbering system template shows how to keep tool numbers inside controller limits without tangling them with storage addresses.
Check software limits first
Before printing anything, confirm allowed characters, maximum length, barcode type and location hierarchy with whatever tool holds your inventory, even if that is a spreadsheet. A code your system truncates is a code you will reprint.
Fixed, random or hybrid: which storage logic fits
This is the decision most guides skip for machine shops.
- Fixed locations give a part a permanent home. Tool Y always lives in bin A-02-B-04. Oracle's JD Edwards guidance notes that fixed locations suit storeroom items, consistent-volume items and consumption locations, and that a storeroom serving workers who need tools or consumables at random times benefits from fixed locations.
- Random locations put stock wherever there is room. The same guidance says they are especially useful in seasonal industries where quantities vary through the year.
- Hybrid keeps fast movers in fixed spots and lets slow movers float in reserve storage.
The tradeoff is space. One vendor eBook says a dedicated bin strategy needs 65 to 85 percent more space than a random strategy. That figure is from 2016 and describes warehouses in general, so treat it as a direction rather than a measurement of your shop.
What we recommend for most job shops: fixed locations for the crib itself (cutters, holders, gauges, consumables), because operators come at unpredictable times and need muscle memory. Random or semi-random locations for raw stock and finished work waiting to ship, where the mix changes with every job.
How to set up a bin location system in a CNC shop
Follow this order. It keeps the project small enough to finish.
- Walk the floor and list every storage spot. Cabinets, drawers, wall racks, carts, bar racks, the fixture cage. Sketch a rough map.
- Assign zones and write the code format on one page. Include the example codes and the rules above.
- Clear out before you label. Remove broken, duplicate and obsolete items. Labeling clutter just gives clutter an address.
- Group by function or operation. Group tools by type, such as cutting, measuring and fastening, and standardize names like "1/4 carbide cutting inserts" instead of "bits". Or store by operation or machine type if your work is repetitive.
- Label every bin, shelf and drawer. Include human-readable text plus a barcode so people and scanners can both read it.
- Enter the locations and items into your inventory records. One label equals one location record.
- Run a short pilot. One cabinet or one wall for two weeks, then adjust before doing the rest.
- Name an owner. A dedicated tool crib manager maintains standards and spots problems early, and a visual system helps new hires get up to speed faster.
For oversized items, copy what Ripley Machine did. After organizing its crib by tool number in cabinets, it placed tools too big for the cabinets in well-labeled bins on a nearby shelf, and for tools stored elsewhere it set up a drawer slot with a card saying where to find them. A placeholder card is a cheap way to keep the crib the single source of truth.
If you want to see how the physical layout and the records fit together, our guides on tool crib layout with minimal records and practical tool crib management go deeper on the stations and processes.
Labels that survive a shop floor
Shop floors are hard on paper. Coolant mist, chips and gloves wear labels fast. One vendor guide reports that paper labels often fall off or fade within 60 to 90 days, which is that company's claim and not a universal number, but it matches what many shops see. Use laminated or durable synthetic stock, and put labels where hands and eyes naturally go: the front edge of the shelf, the face of the drawer.

On barcode type, Code 128 is a sensible default for shelf and bin labels because it is compact, handles letters and numbers, and is read by linear and laser scanners. QR codes make sense when phone cameras will scan or when the code must survive partial damage. If your operators will scan with a phone, QR is the easier path.
Color helps too. Color-coded zones make identification faster in a tool crib. A colored stripe on the zone letter lets someone find the right cabinet from across the room.
Layout ideas that pair well with bin codes
Contour Tool describes a three-station crib: a teardown station with color-coded bins and setup sheets, a station for setting up the next job, and a tool center where tools are pre-set before they reach the machine. Each station can be its own zone in your code, so a returned tool and a staged tool never share an address.
For high-turnover consumables, add a two-bin system. Kanban or minimum stock levels with two bins keep a reserve bin behind the working bin: when the first empties, you reorder and start on the second. Our two bin system guide lays out the five steps, and the reorder point formula helps you size the reserve.
Keeping the system accurate day to day
Most failures happen after launch. One vendor's setup guide lists the usual causes: teams inventing their own naming styles per aisle, labels failing, stock moving without a record update, and staff skipping scans when things get busy. Those are that company's observations, but they ring true on any floor.
Habits that prevent them:
- Return the tool to its bin, then log it. Make the return step part of the job close-out. Enforce return policies to avoid wandering tools.
- One naming style, written down. Anyone adding a location follows the one-page format.
- Count a little, often. Cycle counts on one zone per week catch drift before it grows. See our inventory cycle counting guide.
- Review breakage and losses. Missing and broken tools tell you where the system leaks. Our tool breakage tracking guide covers a simple log.
- Train new people on day one. A visual system only works if everyone uses it the same way.
A factory case study from a tracking vendor reported that the average time to find a required tool fell from 12 to 18 minutes to 2 to 3 minutes after location tracking went live. That was a real-time tracking installation in one German plant, so do not expect the same result from labels alone. The direction is still instructive: knowing where tools are removes minutes from every job.
Connecting bin locations to work orders
The payoff arrives when locations connect to jobs. Ripley's ERP lets managers see the tools required for a work order and the current stock with a click during contract review. That is only possible because the crib was organized first. Larger shops that already run an ERP can explore AI agents for ERP workflows to pull that stock and work order information into everyday reporting.
For smaller shops, the same logic works with simple records: list the tools a job needs, check each against stock, pull them from their bins before the job is staged.
Our perspective
We built Availzye Machinist Pro around one belief: a machinist should not have to juggle a calculator, a spreadsheet, a paper log and a whiteboard to run a job. Storage is part of that same problem. A bin location code is cheap and a good habit, but it only helps if the record behind it stays current.
That is why we put the Tool Crib next to the calculators in a single cloud-synced application. Inventory with CSV import, check-in and check-out, restock, write-off, low-stock alerts and tool life logging live in the same place where you work out feeds and speeds or track a job. Our approach is designed so the person at the machine and the person ordering tools are looking at the same numbers.
Our advice is to design your code on paper first, keep it boring and consistent, and let software carry the record-keeping so the system survives busy weeks.
Availzye
Put your bin codes into a working tool crib
Once your code format is settled, you need a place where the inventory, the checkouts and the low-stock warnings live together. The Availzye Machinist Pro Tool Crib is built for that: CSV-based inventory, check-in and check-out, restock and write-off, low-stock alerts and tool life logging, alongside the calculators and Job Tracker you already use.
Plans are Individual at $9.99 CAD per month, Small Shop at $24.99 CAD per month and Team at $49.99 CAD per month, and each starts with a 7-day free trial. See the plans and start your trial.
FAQ
What is a bin location code?
It is the short address of one storage spot, built from levels such as zone, bay, shelf and bin. For example, A-03-C-07 means bin 7 on the third shelf of bay 3 in zone A. The code tells you where an item belongs, not what the item is.
How do I create a bin location in a small shop?
Map your storage into zones, bays and shelves, then give each spot a code in one consistent format, with leading zeros. Label the physical spot with text and a barcode, and enter the location into your inventory records. Start with one cabinet before doing the whole floor.
Should tools have fixed or random bin locations?
Fixed locations suit tools and consumables that operators grab at unpredictable times, because the home never changes. Random locations fit stock whose volume swings, such as raw material between jobs. Many shops use fixed for the crib and flexible space for stock.
Which barcode should I use on bin labels?
Code 128 is a common default for shelf and bin labels because it is compact and handles letters and numbers. Choose QR codes if people will scan with phone cameras or if labels may get partly damaged. Confirm what your inventory software accepts before printing.
How often should I audit bin locations?
Small, frequent counts work better than one big annual count. Rotating through one zone each week catches misplaced tools early. Fix the cause when you find an error, such as a missed return, rather than only correcting the record.
Sources
- What is Bin Location? | WareOne
- Machinist clears clutter, improves working conditions | U.S. Army
- Labeling & Bin Location Systems for Efficient Parts Rooms | MH-USA
- Bin location: meaning, numbering and examples | Fretron
- Warehouse Location Labeling Guide | Spartan POS
- Lean Warehouse Aisle-Bay-Level-Position Bin Location Coding | Supply Velocity
- Warehouse Bin Location Labels for Small Teams | Label Codes
- Assigning Fixed and Random Locations in Warehouse Management | JD Edwards Tips
- Gaining Efficiencies Within the Warehouse | SWK Tech
- How to Implement Effective Tool Crib Management | CTIS
- Lean Tooling Transformation at ISO Certified Machine Shop | Ripley Machine
- Warehouse Bin Locations Shopify: Complete Setup Guide | Upzone
- Barcode Bin Labels: Free Template + How to Print | InventoryQuick
- Tool Crib Design 101 for Improved Productivity | Contour Tool
- Best Practices for CNC Tool Inventory Management | CNC Code
- Factory Tool & Material Tracking RTLS Case Study | Grid RTLS